Sunday, 25 August 2013

Super simple strawberry jam!


Strawberries have got to be one of my favourite treats of summer, and a huge favourite of my little man's too (although he strangely doesn't like jam!). This jam recipe is super simple to do and makes 4 very full jars of jam (I used old Bonne Mamon jam jars to give you a rough guide). Make sure the jars have been washed in hot, soapy water then washed cleaned and sterilised. I do this by putting them in the oven on a baking tray for about an hour and using them straight from the oven. I always use Silver Spoon Jam Sugar with added pectin and the recipe is from the back of the packet:
Super Simple Strawberry Jam

900g of strawberries (you could also use raspberries, blueberries, blackberries, cherries, pears, peaches, rhubarb and loganberries with this same recipe),
1kg (1 pack) of Silver Spoon jam sugar with added pectin,
Knob of butter.

1. Hull the strawberries and place int a large saucepan. Crush them with a potato masher until they are pulpy.
2. Add the jam sugar to the pan.
3. Heat gently and stir continuously until the sugar melts. Do not bring to the boil at this point. Add the knob of butter.
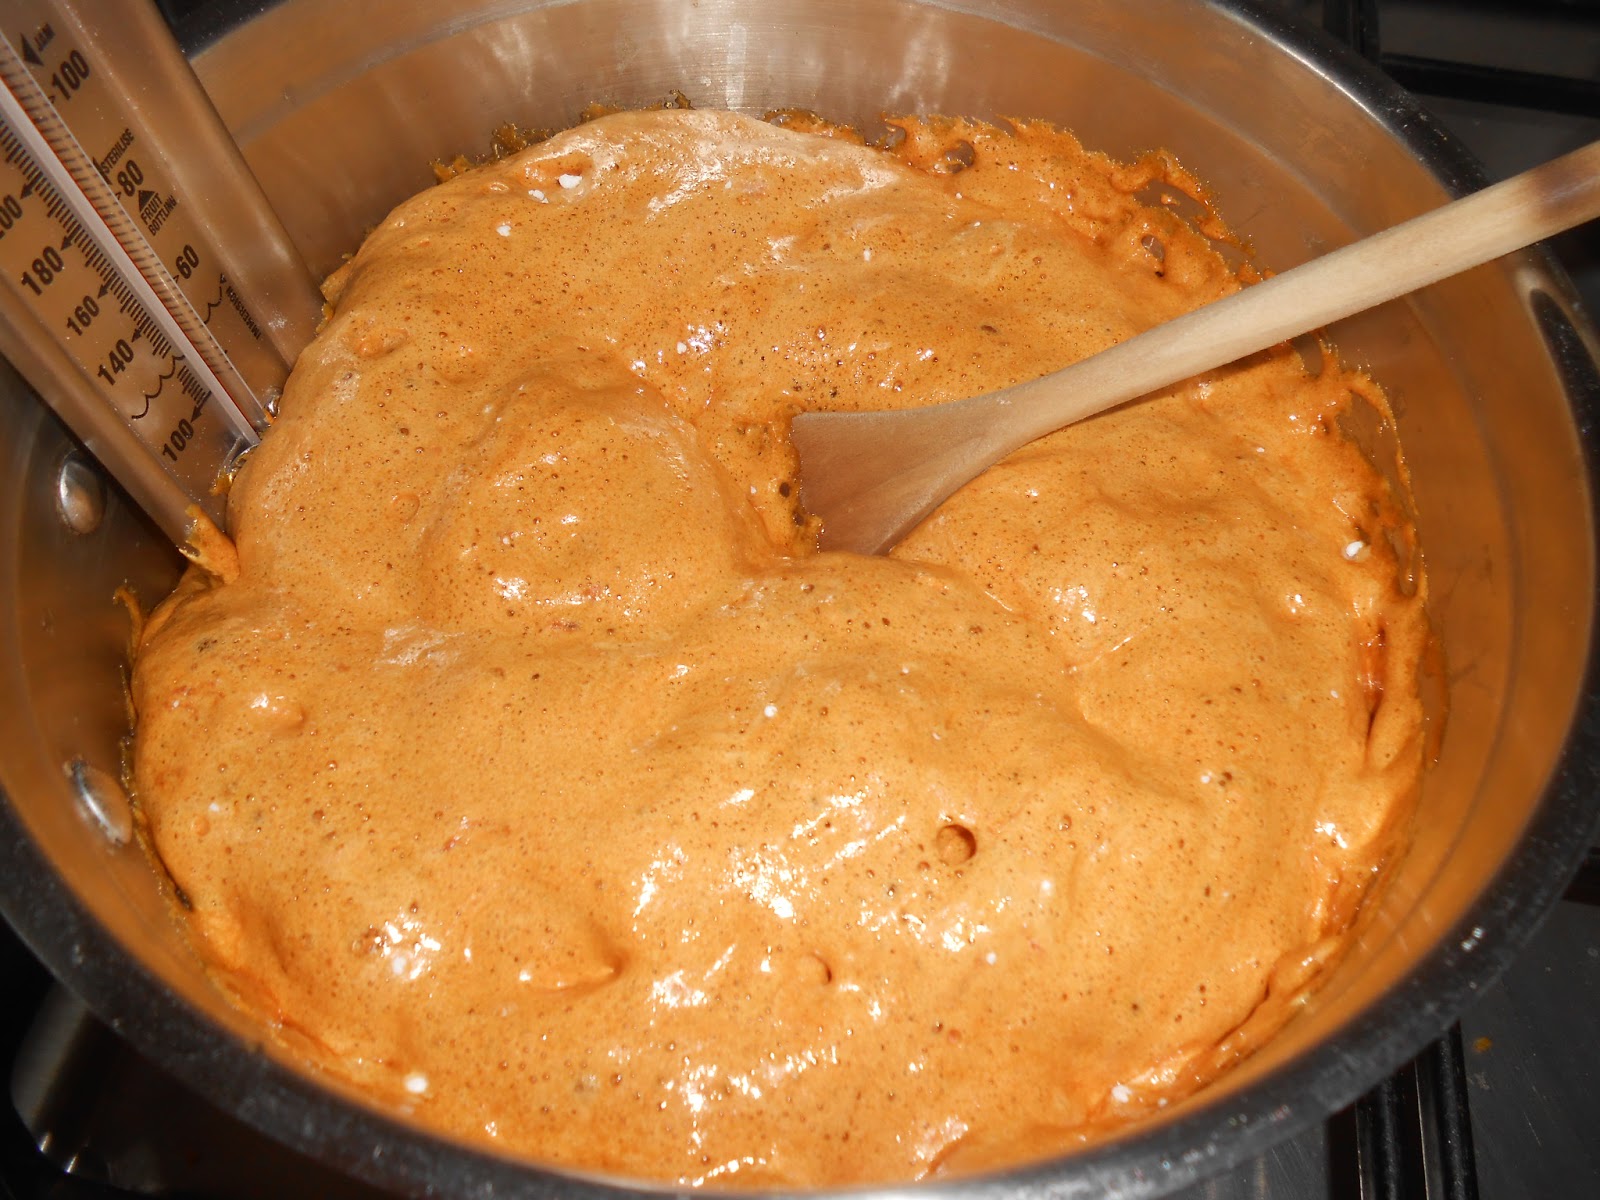
4. Keep stirring, gradually increasing the heat until it reaches a rolling boil that bubbles up and cannot be stirred down again. Boil for 4 minutes, stirring often.
5. Spoon/pour (if you have a steady hand and a good saucepan) into the four sterilised jars and seal immediately. Leave to cool completely before storing in a dark, cool place until you wish to use them. A general guideline is to use within a year if kept unopened and when opened, store in the fridge and use within a month. When my jars have cooled I will add some labels and pretty toppers too!


Perfect for scones with clotted cream!
xxx

Monday, 12 August 2013

Death by Chocolate!

I wish I could blame a major need for chocolate on being pregnant but anyone who knew me pre-pregnancy would know that to be a lie!! Sometimes though, for many a reason, a girl (or a guy) just needs some cocoa goodness so I decided to make this delicious gooey chocolate brownie cake. I never have much luck with brownies so had my fingers crossed for this to turn out better and it is lush!! The original recipe comes from Vegetarian Good Food Christmas and can be found online here:
or you can follow my step by step instructions and adaptions here:

Chocolate Brownie Cake

175g Stork,
200g castor sugar,
225g dark chocolate, broke into pieces (I used a mixture of dark chocolate bars broken up and milk chocolate chips),
3 medium eggs, separated,
65g plain flour,
50g pecans (I used walnuts as that's what was in my baking cupboard, other baker's suggest you could use fudge chunks, sultanas, other nuts, whatever you fancy really).

1. Preheat the oven to 180C/160C fan/gas mark 4.
2. Put the Stork, sugar and 175g of the chocolate into a heavy based saucepan and melt over a very low heat, stirring occasionally. Don't be tempted to turn the heat up and rush this. Leave to cool.
3. If you are using a stand mixer and only have one bowl I would whisk the egg whites next to save lots of washing up. Separate the eggs into whites and yolks and whisk the whites until they form soft peaks and set aside to use shortly.
4. Mix the egg yolks into the cooled chocolate mixture (do let it cool a bit so you don't end up with scrambled eggs!), then mix in the flour, nuts and the other 50g of chocolate.
5. Gently fold in the egg whites a bit at a time until you cannot see any white. You need to work gently and thoroughly (channel Mary Berry at this point) so that you don't knock all the air out of the egg whites but that you do mix them in properly. The egg whites will help the cake to rise.
6. Line a regular round cake tin with foil and gently spoon in all the mixture. Bake for 40 minutes then leave to cool until it is just warm. Turn it out the tin and enjoy.

I am going to be devouring a big piece of this cake tonight with a scoop of mint chocolate chip ice cream, but it would be just as nice with other flavours of ice cream, custard or cream, and I reckon it would be rather enjoyable just on it's own too.
Hope you enjoy this chocolate feast, if you have a fave chocolate recipe don't forget to share it on my Facebook page:

Happy baking!
xxx


Wednesday, 7 August 2013

Banana-rama!

Two things I hate are over ripe bananas and wasting food so this recipe is perfect for battling both of these things; banana loaf. My little man was keen to help me and this is a good recipe to do with little ones as they can help with lots of different parts of it depending on their age and ability. This recipe comes from Jane Bull's 'The Ultimate Cooking Book', a book I have mentioned before that is wonderfully simple and colourful for children to bake from, with excellent step by step pictures for them, and one that I still love now.

Cheeky Monkey Banana Loaf

4oz/100g Stork,
8oz/200g self raising flour,
40z/100g soft brown sugar,
6oz/150g sultanas/raisins,
2 eggs,
2 large desertspoons of runny honey,
3 ripe bananas, mashed.

1. Preheat the oven to gas mark 4/180C.
2. Rub/mix the Stork and flour together until it resembles breadcrumbs.
3. Add the sugar, sultanas, eggs and honey.
4. Mash the bananas with a fork (or your hands if you are a toddler/like getting messy) and mix well into the mixture.
5. Line a loaf tin with foil and pour the mixture in.
6. Bake for 1 hour until golden brown on top.
7. Leave to cool completely in the tin before turning out and slicing like a loaf of bread (serving suggestion is to eat it like malt loaf with butter on, yummy!).


A couple of other suggestions that this recipe has is:
  • to bake this same mixture in fairy cake cases for 15 minutes to make 12 monkey muffins,
  • substitute the bananas for 2 chopped and peeled apples, 125ml of milk and 1 tsp cinnamon,
  • substitute the  bananas for 2 carrots peeled and grated, grated peel and juice of 1 orange and 1 tsp mixed spice.
Both these substitutions can be baked as mini muffins or as a loaf cake!

Enjoy making with your little or big monkeys!
xxx

Monday, 22 July 2013

Turkish Delight Cake

One of my dear friends (and fellow lovers of Turkish Delight) has been away in Africa for the last month visiting family and so I knew I wanted to bake a special cake for her return and I was really pleased with the results! Apologies for the poor quality of photos (lost the camera so used my phone, then forgot to take a photo of it before it was cut!). 
I think this cake is perfect for when you want something a little more special than a normal sponge and the flavours of chocolate and rose work brilliantly together, producing a light, summery, scrummy cake. Let me know what you think when you bake it!

Yummy Mummy's Turkish Delight Cake

8oz/200g self raising flour,
8oz/200g castor sugar,
8oz/200g Stork,
4 large eggs,
3 heaped desertspoons of Green and Blacks cocoa (you can add more or less to your taste),
4 bars of Fry's by Cadburys Turkish Delight.

8oz icing sugar,
4oz Stork,
Pink food colouring (I used Wilton's gel colour, you only need a small amount to get a rosy pink colour),
2tsp rose water.

100g milk chocolate chips.


1. Preheat the oven to 200/180 fan/gas mark 6.
2. Mix together the self raising flour, castor sugar, Stork, eggs and cocoa. Divide evenly between two round cake tins, lined with foil.
3. Chop each bar of Turkish Delight into 6 pieces. Push gently into the top of the raw cake mix, spreading them evenly so that when the cake is sliced there will be Turkish Delight in every slice.

4. Bake in the oven for 20-25 minutes until cooked. Leave to cool completely on a wire rack before removing the cakes from the tin. The Turkish Delight will have sunk into the middle of the cake but if any have gone right to the bottom waiting until it is cool will stop them being pulled out on the foil.
5. Mix together the icing sugar, Stork, pink food colouring and rose water, taste it to check it is rosy enough for you, if you add more use it sparingly. I like to leave this in the fridge for half an hour to firm up.
6. Spread half the buttercream onto one cake and sprinkle over half the chocolate chips. Repeat, putting the top cake on and topping with buttercream and chocolate chips. 
I have been keeping this cake in the fridge due to the 30 degree heat! Hope you enjoy it as much as we have! I will definitely be making this one again!!
xxx 

Wednesday, 10 July 2013

Simple summer sponge!

I think that sometimes simple is best, and this sponge cake is super quick to whip up and bake and can be filled and topped any way you want to. This is my 'go to' cake recipe as it always produces a moist and delicious cake in no time at all, and is so easy to adapt for different recipes by adding other ingredients eg. cocoa, coffee, nuts, fruit etc.

Yummy Mummy's Simple Sponge Cake

200g/8oz self raising flour,
200g/8oz Stork,
200g/8oz castor sugar,
4 large eggs,
2tsp vanilla essence.

1. Preheat your oven to 190C/gas mark 5 and line 2 round cake tins with foil.
2. Mix together all the ingredients and then dollop the mixture evenly into the two tins, lightly smoothing them over.
3. Bake until golden brown (in my electric oven this takes 20-25 minutes but in my gas oven it tok 15-20 so keep an eye on them).
4. Leave to cool in the tins for a few minutes (until they are not too hot to handle), then turn out the cakes onto a wiring cooling rack and leave until cold. 

Now you can fill and top them anyway you want; fresh fruit, buttercream, jam, chocolate ganache etc. For this summery cake I used vanilla buttercream, strawberry jam and fresh strawberries. 


If using fresh fruit, I would recommend sandwiching the cakes just before serving so they don't go soggy!

Happy baking!
xxx

Wednesday, 3 July 2013

Hokey Pokey!

Hokey Pokey (or honeycomb) is a quick and easy sugary treat, that is fascinating for children to watch (but I wouldn't recommend them making it as hot sugar can really burn!!!). It only uses simple storecupboard ingredients and a saucepan, but a sugar thermometer will help you too.

Hokey Pokey

4 tbsp golden syrup,
4 tbsp water,
12 tbsp sugar,
2 tsp of bicarbonate of soda.

1. Use a large saucepan as it will bubble up hugely at the end, put your sugar thermometer in ready. Put the golden syrup, water and sugar in the saucepan and heat very gently over a low heat so you don't burn it, until you cannot feel any sugary granules on the bottom of the pan.
2. Boil the mixture for about 5 minutes/until it reaches 138C, it will turn a darker colour.
3. Remove from the heat and quickly stir in the bicarbonate of soda, be prepared for it to froth up a lot.
4. Quickly pour out onto a baking tray lined with foil and leave to cool. Do not pat it down or expect it to look pretty, it will deflate a little as it cools.
5. When it is completely cool break into pieces. I dunked mine into Cadburys chocolate to make mini crunchies!

This is best eaten the day you make it but a little goes a long way! Don't make this just before a visit to the dentist!!!

xxx

Sunday, 16 June 2013

Banoffee Pie!

Banoffee pie is one of my favourite puddings! It's quick and simple to make, has bananas in so must be one of my five a day, and is loved by nearly everyone (except banana phobes!). This recipe is originally Julie Ann's with a few adapations of my own, so I hope she doesn't mind me sharing it.

Julie Ann's/Yummy Mummy's Banoffee Pie

7oz/175 digestive biscuits, whizzed to fine crumbs (if you like a good thick biscuity base and sides on your pie then make half again, or even double this),
4oz/100g Stork, (if you have altered the amount of biscuits you use, make sure you do the same to the amount of Stork)
1 can of Carnation Caramel (if you want to make the toffee from scratch I have put two ways of doing this at the bottom, since this came about though I have never made my own for a banoffee pie),
3 large bananas,
1/2 pint of whipping cream.

1. Whizz the digestive biscuits to fine crumbs. Melt the margarine in a saucepan over a low heat and stir in the digestive biscuits.
2. Press this mixture into a greased tin, on the bottom and up the sides if you wish. Leave to cool in the fridge for several hours or overnight.
3. Whip the cream until thick and spreadable.
4. Chop the bananas into coin shapes and place evenly on top of your biscuit base.
5. Cover with the caramel, using a spoon to dollop it on and a knife to spread it. I find this stops it moving the bananas about too much. 
6. Cover with whipped cream and decorate as you like, I used a square of dark chocolate and a peeler to make tiny chocolate curls.
7. Keep refrigerated until ready to be devoured!!
If you want to make your own caramel there are 2 ways to do this that I know of:
1. Place a tin of condensed milk in a large pan of boiling water. Simmer for 2 hours making sure the pan never 'goes dry' and that the can is always under water. Leave to cool completely, you need to do this the day before really. I can't stress enough how much you must keep an eye on it as if it boils dry the can could explode which will ruin your kitchen and if it gets onto you or someone else cause serious burns! I have personally never done it this way but this is a very traditional way of doing it.
2. Empty a tin of condensed milk, 4oz/100g Stork and 2oz/50g of soft brown sugar into a saucepan. Put on a VERY low heat and stir all the time until it thickens. Add a few drops of vanilla essence and then leave to cool. This is how I make caramel for Millionaire's shortbread as it is a bit thicker and sets a bit more.

xxx